If you’re in charge of maintenance or run a manufacturing floor, you know how costly servo motor downtime can get—especially with OEM repair lead times stretching from 8 to 16 weeks. That’s why mastering how you can perform servo motor repairs in-house isn’t just smart—it’s essential. By handling common faults yourself, you’ll slash repair costs by 60–80% and keep your lines moving without waiting on outside shops.
In this guide, you’ll get straight-to-the-point, hands-on steps to diagnose and fix your servo motors safely and effectively. From bearing replacements to encoder troubleshooting, we cover what’s doable inside your shop—and when it’s time to call in the experts. If you want to reduce downtime, avoid rookie mistakes, and build rock-solid repair confidence, keep reading. This isn’t theory—it’s practical advice from engineers who’ve rebuilt thousands of servos.
Understanding Servo Motor Construction and Common Failure Modes
Before you dive into in-house servo motor repairs, you need a solid grip on the motor’s construction and the typical issues you’ll face. Servo motors generally come in two main types: permanent magnet and induction. Knowing the difference helps you troubleshoot effectively.
Permanent Magnet vs. Induction Servo Motors
- Permanent Magnet Servos: Use strong magnets in the rotor, offering high efficiency and good torque at low speeds. Common in precision applications.
- Induction Servos: Rely on electromagnetic induction in the rotor. Typically more robust but slightly less efficient in certain load conditions.
Key Components You’ll Deal With
Your repair toolkit should focus on these parts since they’re crucial to motor function and prone to wear:
- Stator: The stationary part with windings; creates the magnetic field.
- Rotor: The rotating core; holds magnets (permanent magnet type) or conducts induced currents (induction type).
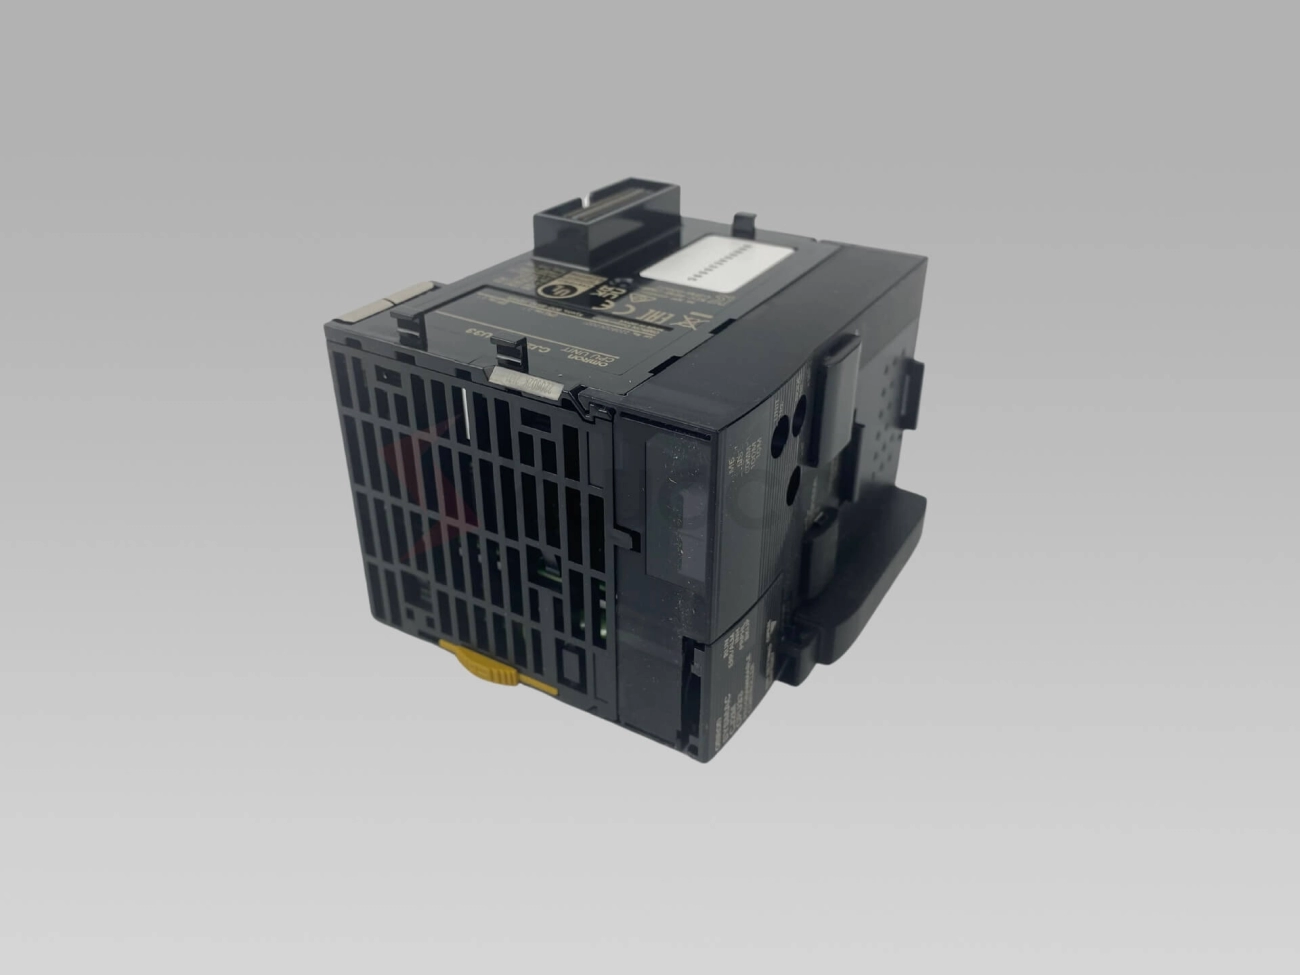
- Encoder/Feedback Device: Measures rotor position and speed; critical for control.
- Bearings: Support the rotor shaft; wear out frequently.
- Brake: Holds the shaft when stopped; common in some servo systems for safety.
- Connector: Interfaces the motor with the controller; wiring faults here cause many operational issues.
Top 8 Common Failure Modes, Ranked by Frequency
Understanding what fails most often can save you time:
-
Bearing Failure
The most common issue. Bearings wear from contamination or lubrication failure. Listen for unusual noise or vibration.
-
Encoder Faults
Difficult readings or complete signal loss disrupt positioning. Dirty optics or damaged resolver windings are usual suspects.
-
Winding Insulation Breakdown
Aging or overheating causes insulation to crack, leading to shorts or ground faults detectable by megger or hi-pot tests.
-
Connector and Water Ingress Damage
Moisture or dirt infiltrating the connector causes intermittent faults or corrosion.
-
Brake Failure
Brake coils can burn out or mechanical parts wear, impacting safe stop functions.
-
Magnet Degradation
Rare-earth magnets lose strength over time, especially if overheated or mechanically shocked.
-
Shaft or Keyway Damage
Worn keyways or bent shafts cause runout issues and vibration, reducing motor life.
-
Overheating and Contamination
Dust, dirt, or poor cooling lead to thermal stress and premature component wear.
Knowing these common failure modes sets you up to perform targeted diagnostics and repairs confidently. Later steps will guide you through how to inspect and fix these components safely and effectively.
Safety First – Mandatory Protocols Before Any Repair
Before diving into any servo motor repairs, safety has to be your top priority. Start with lockout/tagout procedures to make sure all power sources are securely disconnected and can’t be accidentally turned on while you’re working. Always wear the right personal protective equipment (PPE) like gloves, safety glasses, and anti-static wristbands—especially since static discharge can damage sensitive components.
Speaking of static, take ESD precautions seriously. Servo motors often have delicate electronics including encoders and sensors, so grounding yourself and your workspace is essential to avoid damaging these parts.
Another critical safety step is discharging capacitors before touching any internal wiring or circuit boards. Capacitors can hold dangerous charges even when the motor is unplugged. Use a resistor or manufacturer-recommended method to safely drain stored energy.
Finally, when handling servo motors with rare-earth magnets, be extra cautious. These magnets are very powerful and can cause injury or damage nearby electronics. Keep metal tools away, and work slowly to avoid sudden magnetic attraction or pinching.
Following these safety protocols not only protects you but also helps prevent further damage to your servo motor during repair.
Essential Tools and Test Equipment for In-House Repair
To perform effective servo motor repairs in-house, having the right tools is crucial. Here’s a breakdown of must-have versus nice-to-have equipment, with some top 2026 model recommendations to keep your workshop up-to-date.
Must-Have Tools
- Oscilloscope: For examining electrical signals and troubleshooting feedback devices.
- Megger (Insulation Tester): Essential for checking winding insulation integrity to prevent failures.
- Surge Tester: Helps identify winding shorts and breakdowns.
- Encoder Tester: Critical to diagnose encoder faults and ensure proper feedback.
- Bearing Pullers: For safely extracting damaged bearings without harming the shaft.
- Basic Hand Tools: Screwdrivers, torque wrenches, pliers, and calipers.
Nice-to-Have Tools
- Growler: Useful for detecting winding shorts without disassembly.
- Thermal Imager: For spotting hotspots that indicate electrical or mechanical issues.
- Digital Multimeter with Advanced Features: For quick voltage, current, and resistance checks.
- Stator Coil Winder: For minor winding repairs or touch-ups in-house.
- Vibration Analyzer: Helps monitor bearing health and detect early mechanical failures.
Recommended Diagnostic Kits
Doumi provides specialized servo motor diagnostic kits that bundle several of these essential tools. These kits simplify troubleshooting and reduce downtime, especially when paired with their clear guides for testing and calibration.
Equipping your maintenance team with these tools ensures thorough testing—from megger testing servo motors to detailed encoder and bearing inspections. For related parts and automation system essentials, check out Doumi’s automation system components to complement your repair toolkit.
Step-by-Step Diagnostic Workflow for Servo Motor Repairs
Performing a thorough diagnostic is the first step before any in-house servo motor repair. Here’s a clear workflow to follow:
1. Visual & Mechanical Inspection
- Check for obvious signs like corrosion, dirt buildup, or external damage.
- Spin the shaft by hand to feel for rough bearings or unusual resistance.
- Inspect connectors and cables for wear or water ingress.
- Look for brake wear or misalignment.
2. Electrical Tests
- Measure winding resistance and inductance with a reliable multimeter.
- Use a megger tester to check insulation resistance—low values here point to winding breakdown.
- Perform hi-pot testing to verify electrical isolation under high voltage stress.
These checks identify short circuits, open coils, or deteriorated insulation in the motor windings.
3. Feedback Device Testing
- Test encoders or resolvers using specialized testers to catch failures or misalignment issues.
- Confirm signal integrity and correct resolution output. Faulty feedback often causes position errors or servo faults.
4. Back-Drive / Jog Test
- If safe, run a jog test on the servo to check mechanical smoothness and response.
- Listen and feel for unusual noises, vibrations, or irregular motion, which can indicate internal problems like bearing failure or winding issues.
5. Decision Tree: Repair In-House → Send to Doumi → Scrap
- If issues are minor (bearings, encoder, connectors), proceed with in-house repair.
- For serious faults like major winding damage, rotor magnet issues, or proprietary encoder problems, consider sending the motor to experts like Doumi’s servo amplifier unit services for professional handling.
- When repair costs exceed replacement value or safety-critical specs are compromised, opt to scrap the motor.
Following this diagnostic workflow helps you pinpoint the exact problem efficiently and decide the best action for each servo motor.
In-House Repair Procedures (Most Common Fixes)
Performing servo motor repairs in-house can save significant downtime and cost. Here are the most common fixes you can handle yourself, along with some practical tips.
Replacing Bearings
Bearings are the top failure point in servo motors. Use quality bearing pullers and follow a step-by-step photo sequence when removing and installing:
- Remove the motor from its mounting.
- Carefully extract the old bearings with a bearing puller.
- Clean the shaft and bearing seats thoroughly.
- Press-fit new bearings without applying pressure on the balls.
- Reassemble and ensure smooth shaft rotation.
Consistently keeping bearings clean and well-greased during reassembly extends service life.
Encoder Replacement & Re-alignment
Encoder faults are common and critical to motor feedback. Whether you have resolvers or optical encoders, follow these tips:
- Disconnect power and carefully remove the encoder housing.
- Replace faulty encoders with exact model matches.
- Perform resolver alignment procedures to ensure accurate position sensing.
- Test the encoder output with a dedicated encoder tester before full reassembly.
For manuals and compatible units, check options like the Sanyo P50B servo motor that feature integrated encoders.
Cleaning & Re-greasing
Contaminants and old grease cause overheating and wear. Regular cleaning includes:
- Wipe down internal components with lint-free cloths.
- Use appropriate solvents to clean grease and dirt.
- Apply fresh Class H insulation-rated grease on bearings and moving parts.
- Avoid over-greasing; excess leads to heat buildup and leaks.
Connector & Cable Repair
Connector faults often cause intermittent failures. To repair:
- Inspect wiring and connectors for corrosion or damage.
- Replace damaged cables or connectors with OEM-spec parts.
- Use water-resistant sealing compounds to prevent moisture ingress.
- Verify continuity with a multimeter before reinstalling.
For related replacement parts, explore Mitsubishi servo components for reliable connectors and cables.
Brake Replacement or Rebuild
Servo brakes are safety-critical and require precision during repair:
- Remove brake assembly carefully, keeping track of springs and plates.
- Inspect friction surfaces for wear; replace pads if needed.
- Clean and lubricate moving parts.
- Test the brake at the rated voltage before reinstallation.
Minor Winding Touch-Up
Small winding issues like insulation cracks can be repaired using:
- Class H insulation kits designed for high-temperature motor rewind.
- Carefully strip damaged insulation without nicking the copper.
- Re-insulate and seal with varnish to prevent future breakdown.
Shaft Repair & Keyway Fix
Shaft damage or worn keyways impact torque transmission:
- Smooth minor shaft runout with a fine file or lathe.
- Repair keyways by welding and machining to restore correct profile.
- Always verify shaft straightness and fit before reassembly.
Handling these common repairs in-house reduces expensive motor replacements and keeps your equipment running smoothly. Proper tools and recommended parts like the BR-4PP servo drive complement your repair efforts for optimal results.
When NOT to Repair In-House (Red Flags)
Knowing when to pass a servo motor repair to professionals is just as important as knowing how to fix it yourself. Here are the key red flags signaling you should avoid in-house repairs:
-
Rotor Magnet Damage or Demagnetization
If the rotor magnets are damaged or have lost their magnetic strength, repairing them in-house is almost impossible. This kind of fault requires specialized equipment and expertise to restore or replace the magnets properly.
-
Major Stator Burnout
When the stator windings have suffered significant burnout or insulation failure beyond minor touch-ups, it’s best to send the motor out. Attempting major rewinding or full stator replacements without advanced facilities can do more harm than good.
-
Proprietary Digital Encoder Protocols
Some servo motors use closed-loop encoders with proprietary communication protocols. If your encoder is digital and requires special tools or software for calibration, in-house repair becomes tricky and error-prone.
-
Warranty Implications
Opening and repairing a motor in-house can void the manufacturer’s warranty. If your equipment is still under warranty, always check the terms before attempting any repairs to avoid losing coverage.
-
Safety-Critical Applications (Aerospace, Medical)
In sectors where failure can cost lives or cause serious safety issues, like aerospace or medical devices, do not attempt in-house repairs. Let certified service centers handle these cases to maintain compliance and safety standards.
Understanding these limits protects your equipment, your team, and your company from costly downtime and safety risks. If you hit one of these red flags, it’s time to consider expert repair services or replacement options instead.
For an overview of motor control basics or to improve your motor handling knowledge, check out our guide on how to control a three-phase motor using PLC and VFD.
Preventive Maintenance Schedule to Avoid Repairs
Keeping your servo motors in top shape starts with a solid preventive maintenance schedule. Regular checks help catch issues early and avoid costly downtime.
Quarterly Tasks
- Visual inspection: Look for wear, corrosion, or loose connectors.
- Clean & re-grease bearings: Prevent premature bearing failure.
- Check encoder feedback: Ensure signal quality to avoid encoder failure symptoms.
Semi-Annual Tasks
- Vibration analysis: Monitor levels and compare against thresholds (typically 2-3 mm/s RMS for small motors). Excessive vibration can hint at bearing issues or shaft runout.
- Electrical insulation testing: Use a megger to detect winding insulation breakdown before it causes shutdowns.
Annual Tasks
- Thermal imaging scan: Check for hotspots indicating motor overheating or poor connections. Thermal imaging helps spot problems invisible to the eye but critical to fix early.
- Brake function test: Confirm brakes engage and release properly to prevent unexpected machine stops.
- Full rotor and stator inspection: Look for magnet degradation or winding damage.
Sticking to this routine reduces unexpected breakdowns and extends the motor’s life significantly. For detailed controller integration whenever you perform diagnostics, referencing the Siemens PLC 6ES7214-1AG40-0XB0 can help streamline your control and monitoring setup during preventive maintenance.
Building Your In-House Spare Parts Stock (BOM Template)
Having a well-organized spare parts stock is key to cutting downtime and keeping your servo motors running smoothly. Focus on stocking critical components for popular brands like Fanuc, Siemens, Yaskawa, and Allen-Bradley. These usually include:
- Bearings (most frequent failure point)
- Encoders (optical or resolver types)
- Brakes and brake pads
- Connectors and cable assemblies
- Winding insulation repair kits
- Shaft keys and keyways
Keeping parts specific to your most common servo models ensures you’re ready to react fast. For example, if you work heavily with Siemens drives, consider stocking parts compatible with the Siemens HCS02 series, which helps speed up repairs without waiting for shipments. You can check suitable parts linked with items like the Siemens HCS02-1E-W0054-A-03-NNNN Drive to cross-reference common spares.
Before ordering, use a cost vs. downtime calculator to weigh the expense of stocking each component against potential losses from extended machine stops. Sometimes a higher upfront cost saves thousands by slashing downtime.
Tips for managing your BOM:
- Update your list quarterly based on actual repair trends.
- Include shelf-life checks for lubricants and insulation materials.
- Track part serials and supplier lead times.
Having this spare parts strategy means fewer surprises and faster fixes when your servo motor needs in-house repair.
Training Your Team – Resources & Certification
Getting your team up to speed is key for smooth in-house servo motor repairs. Doumi offers a free video training series that’s perfect for technicians starting out or looking to sharpen their skills. These videos cover everything from basic diagnostic workflows to advanced repair techniques, making it easier to build confidence without leaving your shop.
Beyond videos, hands-on workshops provide practical experience with real servo motors and diagnostic tools. These sessions help your team master bearing replacements, encoder alignment, brake repairs, and more. Investing in professional training minimizes costly mistakes and keeps downtime to a minimum.
For ongoing learning and certification, consider routine refreshers and skill assessments. This way, your crew stays updated on the latest repair methods and industry best practices, crucial for maintaining your competitive edge in the industrial automation field.
Explore Doumi’s industrial automation controls resources to find training materials and diagnostic kits designed specifically for servo motor maintenance.