If you’re looking to add an I/O card to your existing Point I/O rack, you already know how crucial seamless expansion is for keeping your automation running without a hitch. Whether you’re hitting module limits or upgrading for new sensors and actuators, this process can be straightforward—if you follow the right steps. In this guide, we’ll cut through the noise and show you exactly how to expand your Allen-Bradley Point I/O system safely and efficiently, saving you time and avoiding costly downtime. Ready to boost your industrial control setup with confidence? Let’s dive in.
Understanding Point I/O Racks and I/O Cards
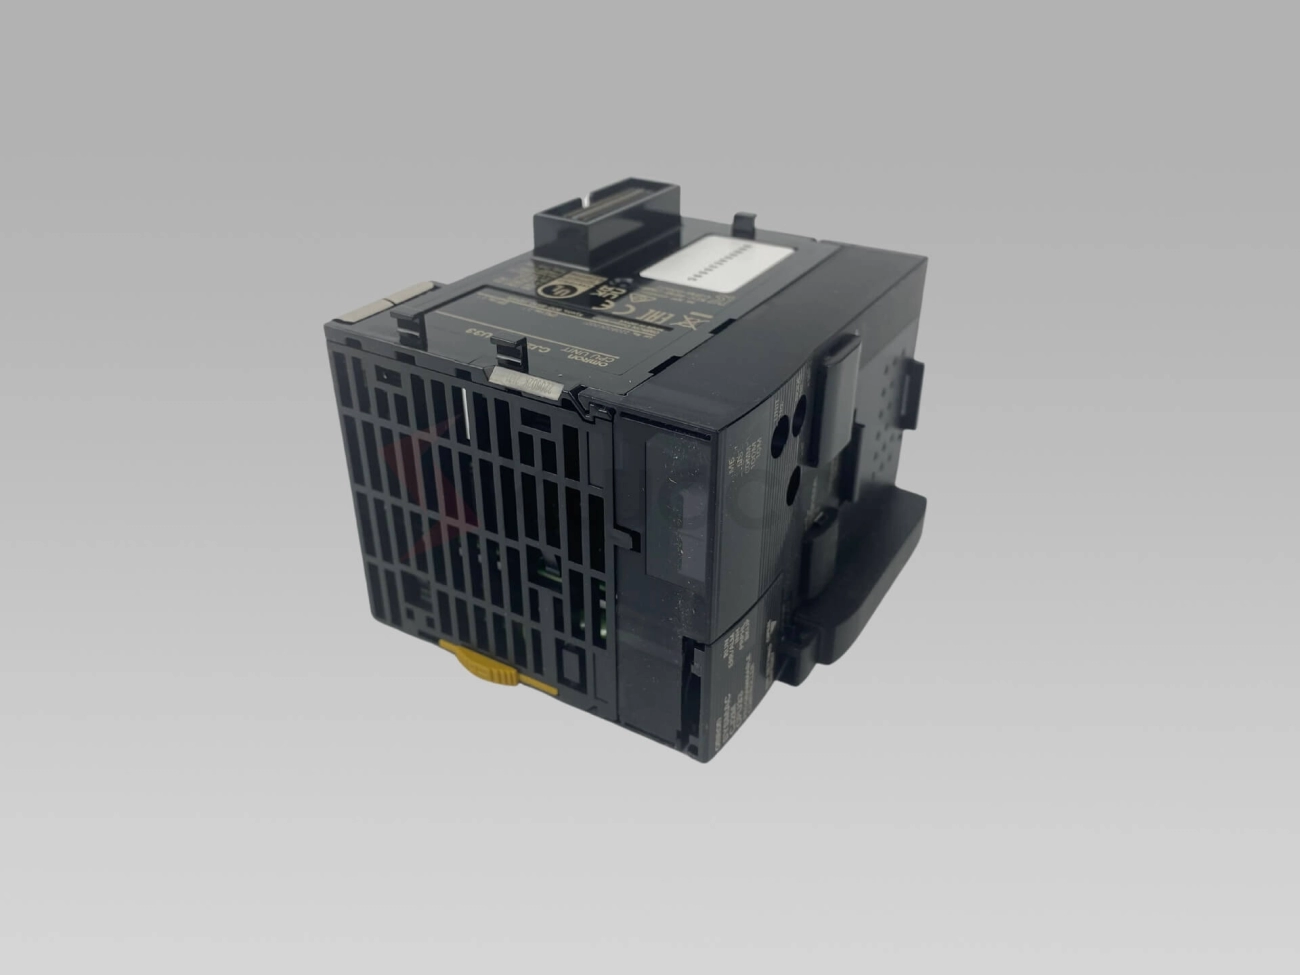
In industrial automation, Point I/O racks serve as compact and flexible platforms that hold multiple I/O cards—the essential modules responsible for connecting field devices like sensors and actuators to your PLC system. Unlike traditional large I/O cabinets, Point I/O racks offer a modular design, allowing you to add or replace individual modules easily to match your system’s needs.
What Are Point I/O Racks and I/O Cards?
- Point I/O Racks: These are slim, DIN rail-mounted backplanes that provide both mechanical support and communication pathways for your I/O modules.
- I/O Cards (Modules): Each card performs specific functions, such as digital input, digital output, analog input/output, or communication interfaces like EtherNet/IP or DeviceNet.
Together, these components play a crucial role in providing reliable, scalable, and real-time data exchange between your PLC and the field devices on your plant floor.
Compatibility Essentials
Before expanding your Point I/O rack, it’s important to consider:
- Rack Capacity: Check the maximum number of modules supported by your rack and ensure adding new cards won’t exceed this limit.
- Power Requirements: Each additional I/O card increases the load on the rack’s power supply. Verify your power budget to avoid brownouts or module failures.
- Module Types: Ensure compatibility between the new module’s communication protocol and the existing network (EtherNet/IP, DeviceNet), as well as firmware versions.
When Should You Expand Your I/O System?
Common reasons include:
- Adding new sensors or actuators to accommodate process changes.
- Upgrading older modules to improve reliability or gain new features.
- Supporting additional industrial protocols or higher speed communications.
For example, a packaging line might require more digital inputs to track additional photo-eyes or safety interlocks. Or a processing plant may need to add analog output modules for new valve positions.
DoumiCNC and Rockwell Automation Specifications
If you’re exploring alternatives to Allen-Bradley Point I/O modules, DoumiCNC offers rugged, UL-listed I/O cards that meet or exceed Rockwell Automation specifications. Their modules provide comparable performance with a faster lead time, often supporting the same mechanical and electrical installation requirements. This makes DoumiCNC a viable option when looking for cost-effective, reliable replacements without compromising system integrity.
In our later sections, you’ll find detailed guidance on selecting compatible DoumiCNC modules and how they integrate seamlessly into existing Rockwell architectures.
For related input modules, check out the Fanuc Digital Input Module – 32 Points 24V DC or explore output units like the Omron CJ Series 16 Point Relay Output Unit for diverse application needs.
Preparing for Installation: Tools, Safety, and Pre-Checks
Before adding a new I/O card to your existing Point I/O rack, safety comes first. Always follow lockout/tagout procedures to ensure the system is completely powered down and isolated. This prevents accidental energizing while you work. Also, handle all modules with proper ESD (electrostatic discharge) protection—wear a grounded wrist strap and work on an anti-static mat to avoid damaging sensitive electronics.
Essential Tools Checklist
Make sure you have these tools ready for a smooth installation:
- Screwdrivers (flathead and Phillips)
- Wire strippers and cutters
- Multimeter or voltage tester
- Torque wrench for terminal screws
- Label maker or permanent markers
- Anti-static wrist strap and mat
- DIN rail mounting tools (often a small pry bar or screwdriver)
Pre-Installation Rack Assessment
Before you start, check your current rack setup:
- Module count: Confirm how many slots are available and which are occupied. Avoid exceeding rack capacity.
- Terminator placement: Make sure end-of-line resistors or terminators are correctly installed to ensure signal integrity.
- Firmware check: Verify that your rack and existing modules have compatible firmware versions. Updates might be necessary for seamless integration.
Compatibility Matrix: DoumiCNC vs Common Modules
If you’re using DoumiCNC modules as alternatives to Rockwell parts, confirm compatibility to avoid surprises. Here’s a quick comparison checklist:
| Feature |
Common Allen-Bradley 1734 Series |
DoumiCNC Equivalent |
| Rack Slot Size |
Standard 12- or 16-slot |
Matches industry standard |
| Communication Protocol |
EtherNet/IP / DeviceNet |
Full protocol compatibility |
| Power Requirements |
Typical 24V DC |
Same as Allen-Bradley |
| Firmware Compatibility |
Rockwell firmware versions |
Compatible or easily updated |
| Physical Mounting |
DIN rail with standard clips |
Same DIN rail setup |
By confirming these essentials and preparing your workspace, you’ll reduce downtime and avoid hardware issues during your Point I/O module expansion.
Step-by-Step Guide: Adding the I/O Card to Your Rack
Power Down and Isolate the System Safely
Before starting, make sure to completely power down your Point I/O rack. Lockout/tagout procedures are a must to prevent any accidental starts. Confirm the system is isolated from all power sources to keep yourself and the equipment safe during installation.
Mount the Module on the DIN Rail
Take the new I/O card and snap it securely onto the existing DIN rail in your rack. Make sure the module lines up perfectly with adjacent cards to ensure a proper fit and stable connection. If your rack uses a modular system like Allen-Bradley Point I/O, proper alignment is key for seamless communication.
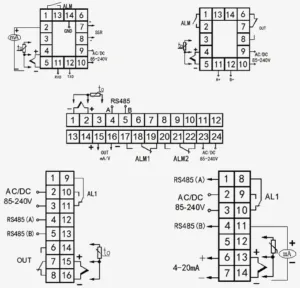
Connect Wiring with Color-Coded Diagrams
Follow the manufacturer’s color-coded wiring diagrams carefully. Connect signal and power wires, observing proper polarity. Be sure to ground the module correctly to avoid electrical noise or faults. Good grounding also helps maintain system reliability in industrial environments common across the U.S.
Install Bus Interface Modules If Needed
If your expansion involves adding more than one bank or section in the rack, you’ll likely need a bus interface module. These modules manage communication between different rack segments. Install these according to your system’s layout and the Rockwell Automation specs to ensure proper bus communication.
Label Cables and Document Changes
Labeling every cable you connect is critical for easy future maintenance. Use durable tags or labels that won’t wear off. Also, update your system documentation or PLC hardware maps to reflect the new I/O card additions. This helps your team troubleshoot and manage the system down the road.
Troubleshooting Common Installation Issues
- Poor connections: Double-check terminal screws and wiring tightness.
- Module not recognized: Verify bus interface and firmware versions.
- Power faults: Confirm proper power supply rating and grounding.
If you run into persistent problems, consult Allen-Bradley Point I/O troubleshooting guides or reach out to tech support to avoid downtime.
Adding a new I/O card to your existing Point I/O rack doesn’t have to be tricky if you follow these clear steps. It keeps your PLC hardware ready for expanded automation needs while maintaining system stability and safety.
Configuring the New I/O Card in Your PLC System
Once your new Point I/O card is physically installed, the next step is to configure it in your PLC using Studio 5000 Logix Designer. Here’s a quick breakdown:
- Add the Module: Open your project and add the new I/O card by browsing the catalog. Select the exact model matching your hardware to avoid compatibility issues.
- Parameter Tuning: Adjust input filters to reduce noise, set scaling to match your sensor or device ranges, and define fault actions to decide how your system should respond to errors.
- Network Addressing: If your I/O card communicates over DeviceNet or EtherNet/IP, assign or confirm the unique network address. Proper addressing is crucial for smooth data flow and avoiding conflicts on the network.
- Testing & Validation: Use loopback testing where possible or run live simulations to verify every input and output functions as expected. This step helps catch wiring or configuration mistakes early.
For faster setups, consider DoumiCNC pre-configured modules—they come ready with optimized settings that save you time and reduce errors during configuration.
If you’re upgrading existing hardware, cross-check with the Fanuc A03B series digital input modules or Omron CJ series relay units for reference on module specs and compatibility to ensure smooth integration.
Verification, Testing, and Optimization for Peak Performance
Once you’ve added the I/O card to your Point I/O rack, the next step is to verify everything is working right and optimize for smooth operation.
Initial Power-Up and LED Diagnostics
Turn the power back on and watch the module LEDs closely. Green LEDs usually mean good health, while red or blinking lights can signal faults. Use this quick check to spot wiring issues, module failures, or communication errors early.
Functional Testing with Oscilloscopes and PLC Tags
Use your oscilloscope or PLC monitoring software to test the signals on inputs and outputs. Check for expected voltage levels and signal behavior to confirm correct wiring and module function. Tag monitoring inside Studio 5000 or your PLC software helps verify data is flowing correctly.
Optimization Strategies
Load Balancing: Distribute I/O load evenly across racks to avoid overloads and ensure stable power delivery.
Redundant Power: Use redundant power supplies if possible to keep your system running during power hiccups.
Hot-Swappable Modules: Choose hot-swappable I/O cards when minimizing downtime is crucial. This lets you replace modules without shutting down the rack.
Performance Metrics to Track
Keep an eye on error counts, communication response times, and input/output cycle rates. Monitoring these helps you pinpoint bottlenecks or early signs of hardware degradation before they cause failures.
By following these verification and optimization steps, you’ll ensure your Point I/O expansion runs reliably and efficiently, keeping your automation system performing at its best.
Common Pitfalls and Expert Troubleshooting Tips
When adding an I/O card to your Point I/O rack, you might run into some common issues. Here’s how to spot and fix them quickly:
- Module Fault Codes: If your module shows fault lights or error codes, check the wiring first—loose or reversed connections are often the cause. Refer to Rockwell Automation’s fault code guide to decode specific errors.
- Bus Communication Problems: Modules not communicating usually point to bus interface errors or incorrect addressing. Double-check the bus interface module like the 1734-AENTR and ensure correct network settings.
- Firmware Mismatches: Outdated or mismatched firmware can cause misbehavior. Use the 1734-AENTR web interface to verify firmware versions and update as needed for smooth operation.
- Power Supply Issues: Insufficient or unstable power triggers faults. Confirm your rack’s power capacity matches the total load after adding new modules.
Advanced Diagnostics With 1734-AENTR Web Interface
The 1734-AENTR Ethernet/IP adapter makes advanced troubleshooting easier. You can:
- Access real-time diagnostics through a web browser.
- Monitor module statuses and individual channel faults.
- Update firmware remotely to fix bugs or add features.
- View detailed logs to pinpoint recurring issues.
When to Call in Professional Support
If you’ve tried these fixes but the problem persists:
- Persistent communication failures after wiring and configuration checks.
- Repeated module resets or system crashes during operation.
- Complex network setup beyond typical DeviceNet or EtherNet/IP configurations.
- Firmware upgrade failures or hardware incompatibilities.
Getting professional help ensures you avoid costly downtime and keeps your Allen-Bradley Point I/O system running smoothly.
FAQs on Vendor Compatibility and Rack Limits
-
Can I mix DoumiCNC modules with Allen-Bradley Point I/O?
Yes, DoumiCNC modules are designed to be fully compatible with Rockwell Automation specs, providing a cost-effective alternative.
-
What’s the max number of I/O modules per rack?
Standard Allen-Bradley Point I/O racks support up to 15 modules per bank, depending on your bus interface module and power supply.
-
Are there limits on module types in one rack?
Some module combinations need specific terminators or bus interfaces—always check your module compatibility matrix before expanding.
By keeping these pitfalls and troubleshooting tips in mind, you’ll save time and keep your Point I/O system running at peak performance.
Why Choose DoumiCNC for Your Point I/O Expansions
When upgrading or expanding your Point I/O rack, DoumiCNC offers clear benefits that set us apart in the U.S. automation market.
DoumiCNC Module Benefits
| Feature |
Benefit |
| Rugged Design |
Withstands harsh industrial environments for long-term reliability. |
| UL-Listed Products |
Meets strict U.S. safety standards, ensuring compliance and peace of mind. |
| Short Lead Times |
Faster delivery means less downtime and quicker project completions. |
| Easy Integration |
Compatible with popular Allen-Bradley and Rockwell systems for smooth scaling. |
Real Savings & Efficiency
One of our recent customers expanded their Point I/O rack using DoumiCNC modules and saw:
- 25% lower hardware costs compared to original brand modules.
- 30% faster installation time, thanks to plug-and-play design.
- Improved system uptime with rugged, quality components.
These features directly impact your bottom line by reducing project costs and minimizing production delays.
Ready to Expand?
For tailored advice, detailed guides, or scheduling a consultation, reach out today. Our team is ready to help you navigate Point I/O module expansion smoothly and efficiently.
Check our lineup for compatible digital input modules here and explore versatile relay output units here.